How to Do Line Art Sketch in Gimp 2108
Text and images Copyright (C) 2002 Dave Neary and may not be used without permission of the author.
Intention
Tutorial on how to make a nice baby & daddy photo into a prissy infant & daddy painting.
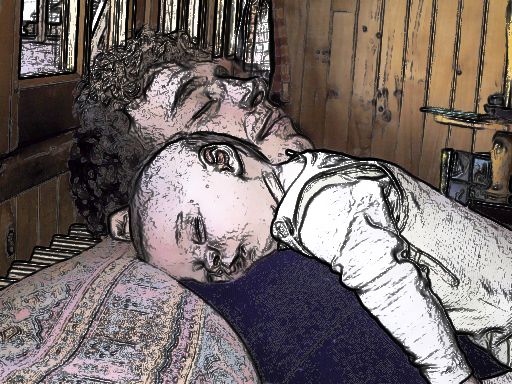
1. Original image
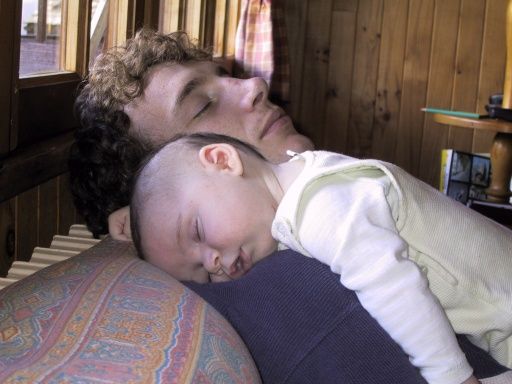
Nice flick of a baby & dad. Ah.
two. After a Sobel edge detect
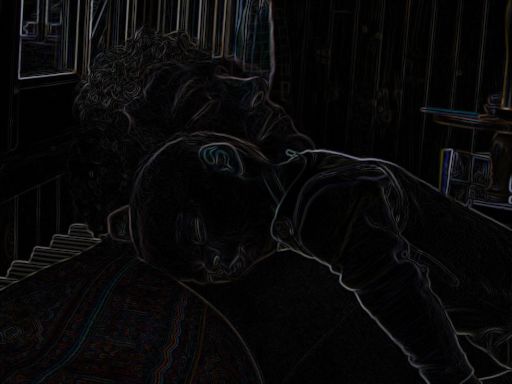
Straightforward Sobel edge observe ( Filters -> Border-Discover -> Sobel) of original (don't forget to salve a copy of the original) The Sobel edge discover should be done on the groundwork image (without an alpha aqueduct) rather than a copy of the background (which has an blastoff channel).
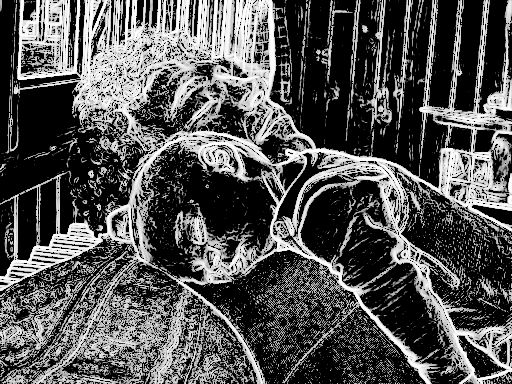
3. Equalised & desaturated Sobel
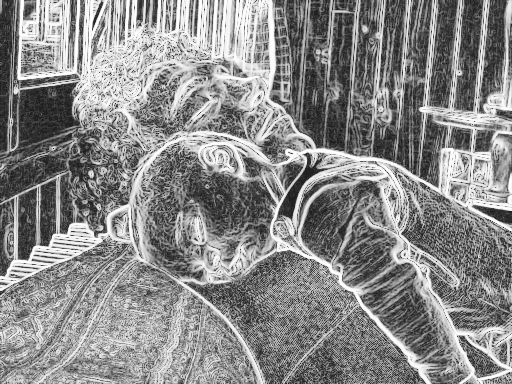
Bring out detail with an auto-equalise ( Layer -> Colors -> Auto -> Auto-Equalize) of the sobel edge detect, and convert information technology to greys using desaturate ( Layer -> Colors -> Desaturate).
4. Curves window for how to practise a highpass filter
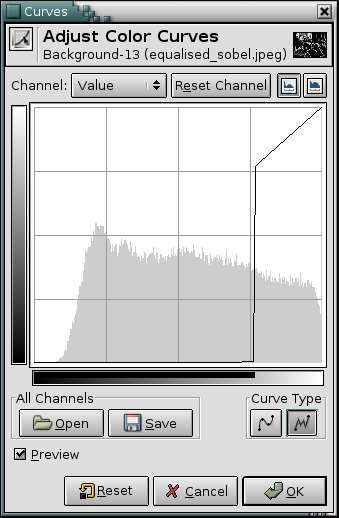
We only want the strong edges, otherwise it'll look crap. To go them, we eliminate the edges with pocket-sized magnitude. The easiest fashion to exercise this is with the curves tool ( Prototype -> Colors -> Curves) like this.
We set the curve type to free (which allows discontinuities), and and so for the lesser 3/4 of the bend (or thereabouts) to 0. But drag the mouse/pen forth the bottom of the curves tool.
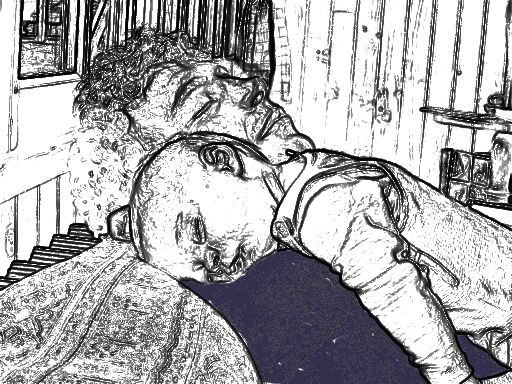
5. Image afterwards the highpass
The result is much cleaner. The but trouble is it'south white-on-black, when we want black-on-transparent ideally.
6. L&C dialog for creating an edges mask
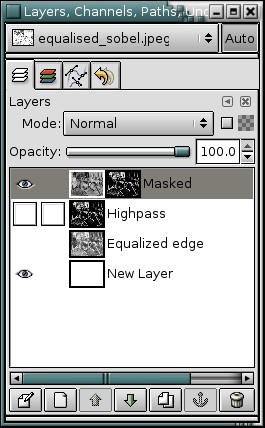
Small flim-flam to get to black-on-transparent. Invert the Sobel border detect (you did keep a copy, right?) with Layer -> Colors -> Invert and apply our highpass-filtered re-create as a mask. To do this, open up the Layers & Channels dialog (if it's not open already), and add a layer mask to the layer with the inverted border detect layer ( Edit -> Copy with the highpass layer selected,
7. Save of the prototype to a higher place to show effect
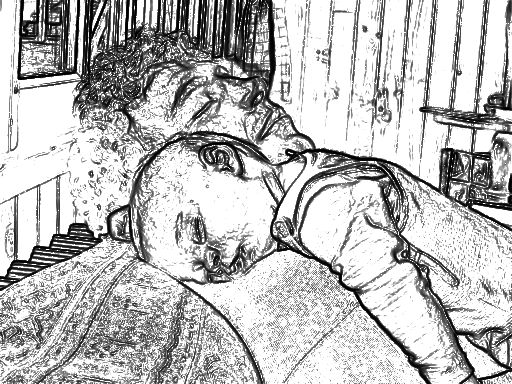
This is the result of the trick above. It's shown here with a white layer behind it. Nosotros could stop hither, and this is a decent sketch outcome. For the colouring, we need some more than work (by and large slogging, though).
8. L&C dialog with fix-upwards for the colouring pull a fast one on
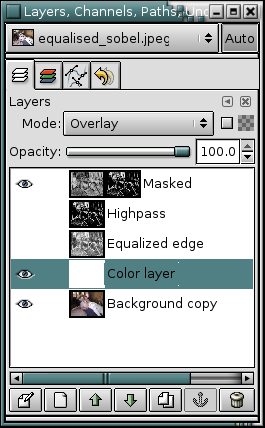
We put our original image dorsum in the background, and set the white layer to overlay (every bit we meet hither) - this means nosotros can see the coloured areas backside the white layer - this is extremely helpful when we're painting the white layer, as sometimes the edges are rather fine, or are in the middle of an surface area that'southward more than or less the same color.
9. Colouring looks after doing one area of the image
Using the colour-picker tool (looks like an center-dropper), nosotros select the colour we want to paint from the original image (merely activate the "original prototype" layer and endeavour to choice a colour representative of an area), and so we re-activate our colouring layer, which is still in overlay fashion. Using a large brush (with the castor tool for more natural edges) we fill in the surface area of that color roughly (doesn't accept to be perfect). You should see the colour darkening as we depict with a colour similar to the background colour.
10. Colouring layer in normal mode
This is what we see if we set the colour drawing layer to normal mode. And we're on our way.
11. Finished with a completed color layer
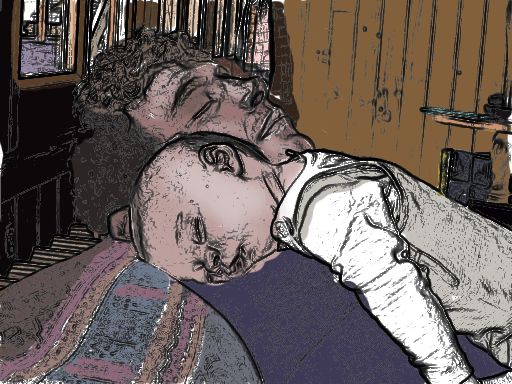
Afterwards some effort, all the regions become filled in. Final touches to make faces and the like look improve for shadows and highlights were achieved past selecting a representative shadow/highlight colour, and adding the extra bits with the airbrush tool (looks like an airbrush). After all our work, nosotros end upward with this very dainty looking painting effect.
creightonmanter1986.blogspot.com
Source: https://www.gimp.org/tutorials/Photo_To_Sketch/
0 Response to "How to Do Line Art Sketch in Gimp 2108"
Publicar un comentario